Summer 2018 at Kullfallet
 A lot of projects were done last summer at Kullfallet, for example a garage with a workshop and a new well.
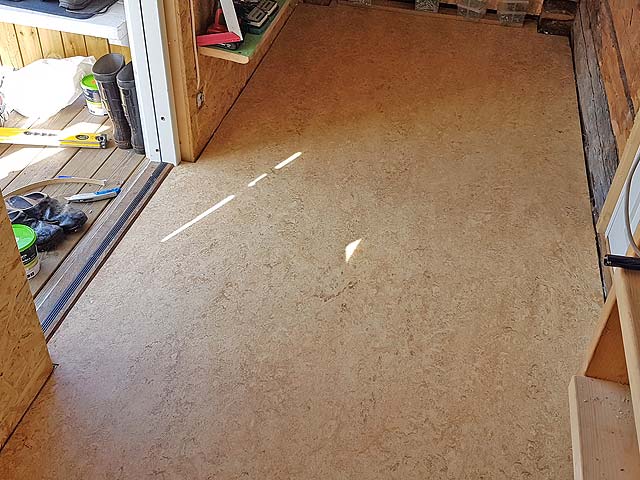
The entrance floor
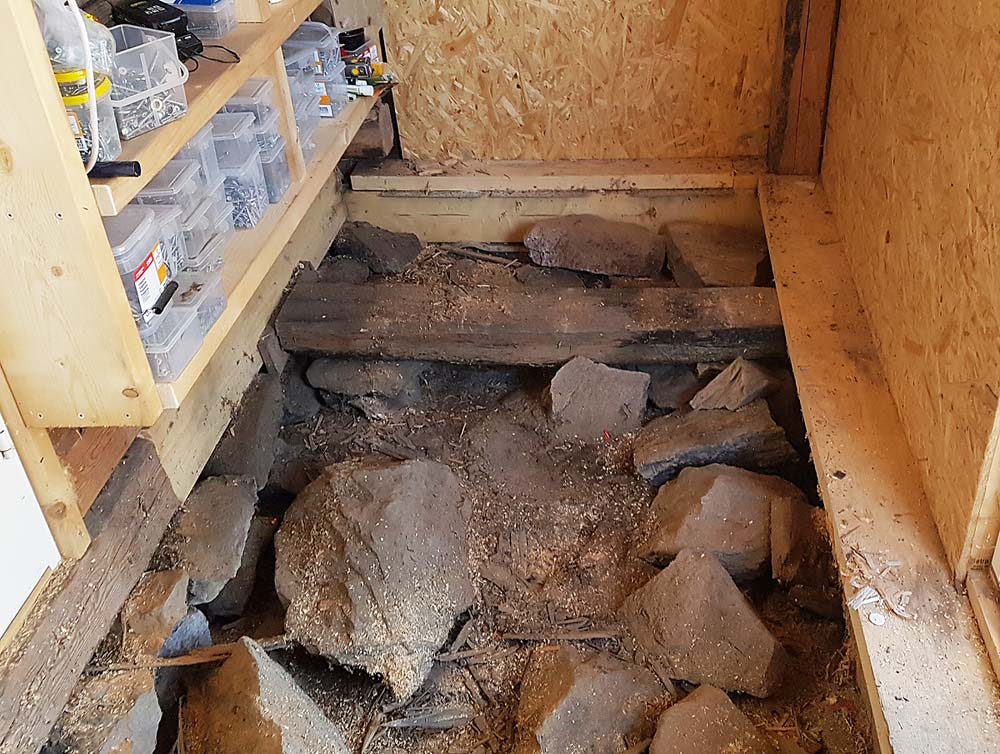
It was time to make a new floor for the entrance vestibule area. I took help from my father to remove the floor boards and old joists, which revealed the stone foundation.
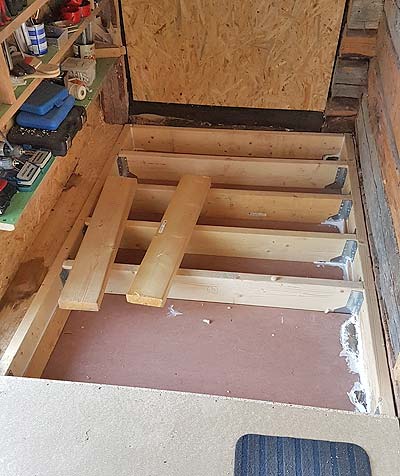 We screwed a frame of 45x145 mm (2"x6") joists to the timber sills. Then mounted joist hangers 60 cm apart, and mounted the joist cross pieces. One end got tighter joist spacing to support the heavy load of the heater tank that will stand there.
Just like in the other rooms, duck board was screwed to the bottoms of the joists, to support the sub boards, seen with a pink color to the left.
I filled up the space with mineral wool and screwed 22 mm (7/8") particle board to make the floor. Finally a tough sheet of linoleum was glued on top.
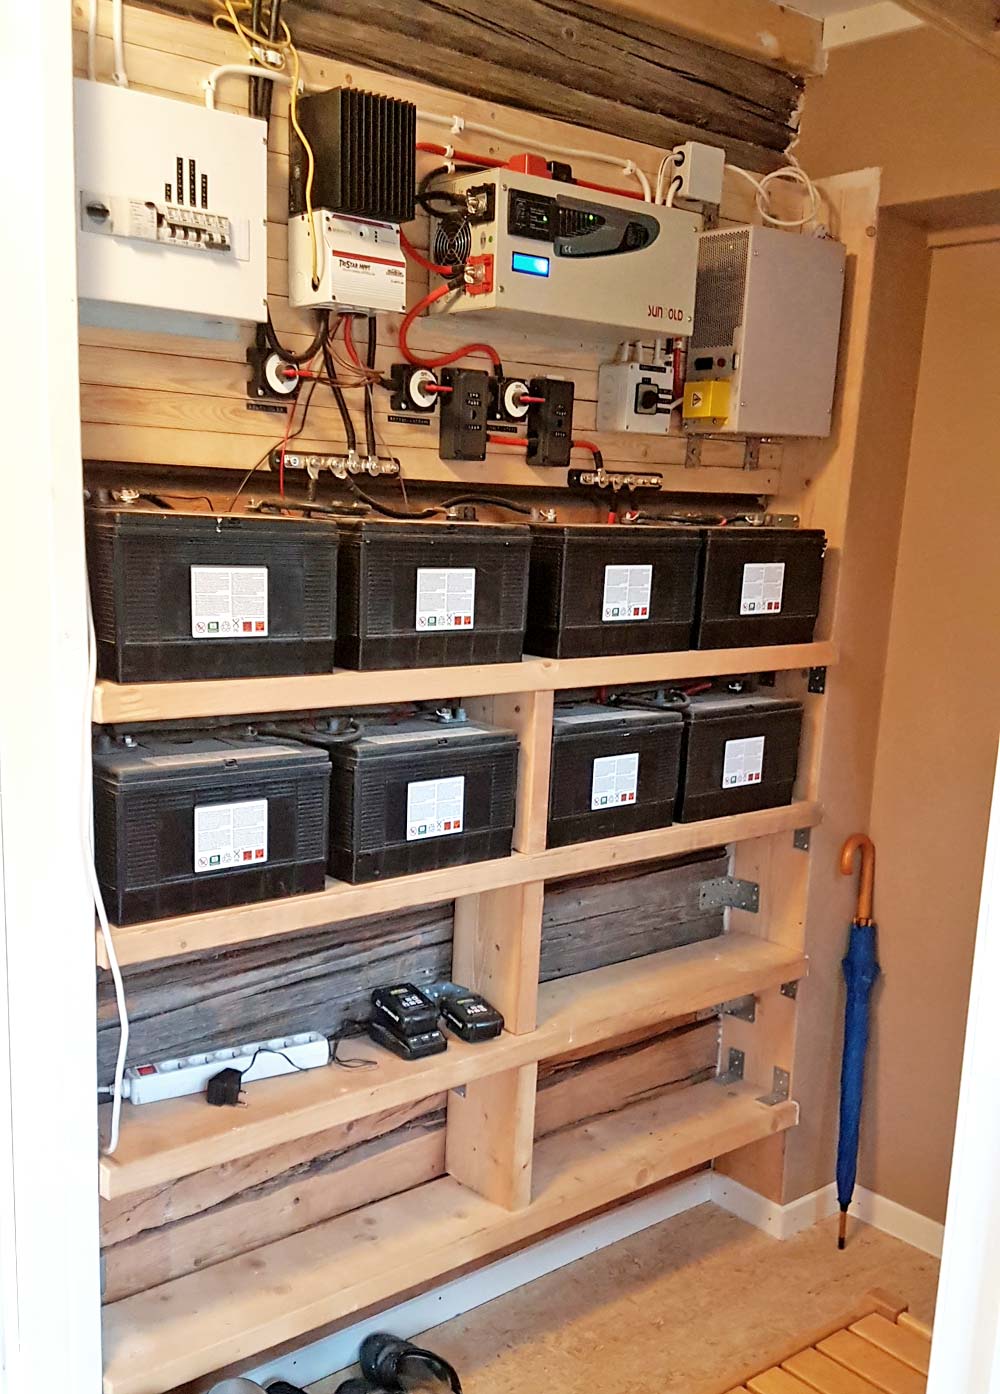
With such a nice new floor, it was time to clean up the electric hub. I made proper battery shelves, and mounted the equipment above them. From left to right in the picture: AC fuse box, solar power charge controller, 3 kW power inverter and 700 W power inverter. Below them are switches and DC fuses. The shelves are currently housing eight 12 V 100 Ah lead acid batteries, with space for 20 when it's time to expand.
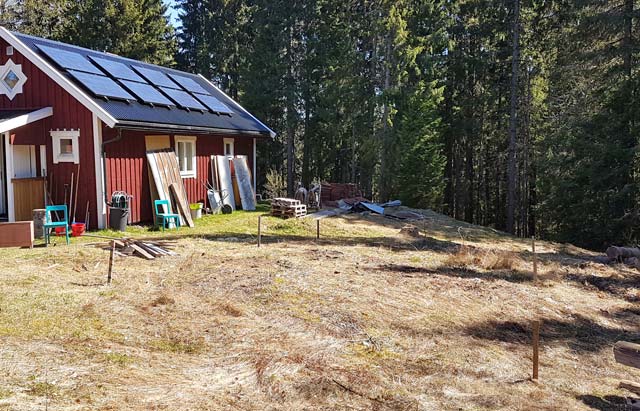
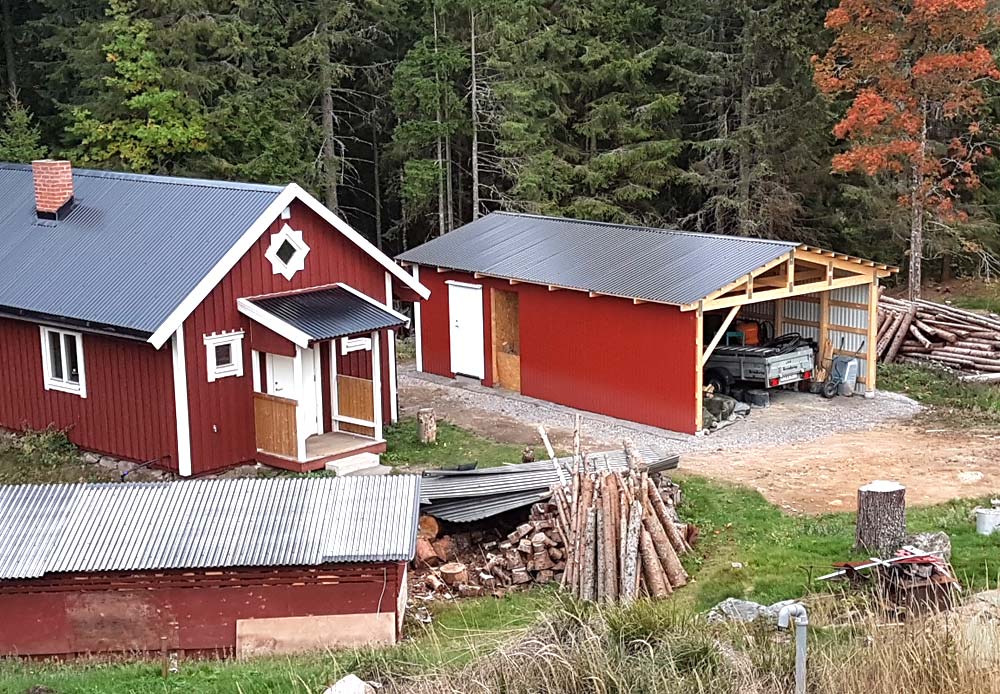
The garage
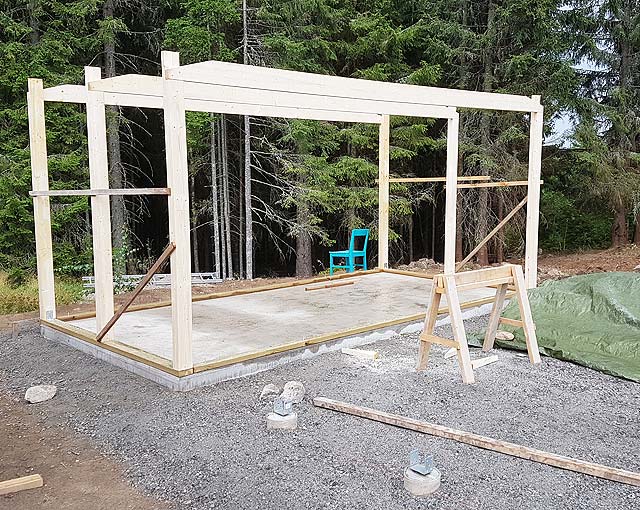
Next it was time for the big project of building a garage to store all my stuff in. I started making some CAD drawings and preparations on the ground. It was a major effort to hand dig away all the dirt to get a level ground for the foundation.
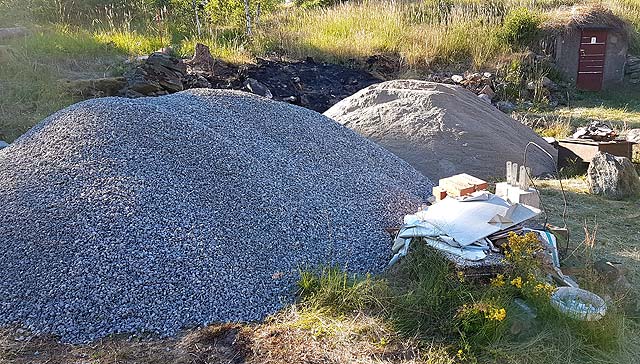
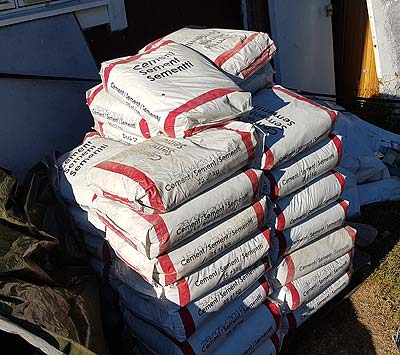 I got large amounts of gavel, sand and portland cement for the project, and also bought a concrete mixer.
I drew the design in Sketchup. The size was to be 8.4 m by 4.8 m, with concrete posts every 1.2 m.
The workshop would be 4.8 m by 2.4 m occupying the far end of the garage, and on a concrete slab. The rest of the garage interior would be on gravel.
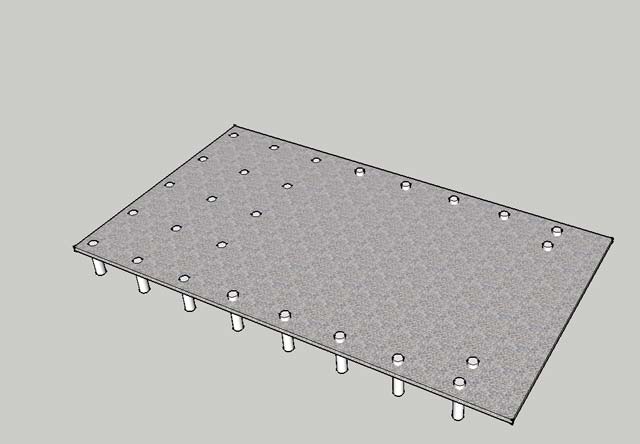
I dug down 200 mm diameter casting tubes to 800 mm depth, and poured in the concrete, with a steel mounting bracket at the top, and some rebar stuck into the tubes for additional support.
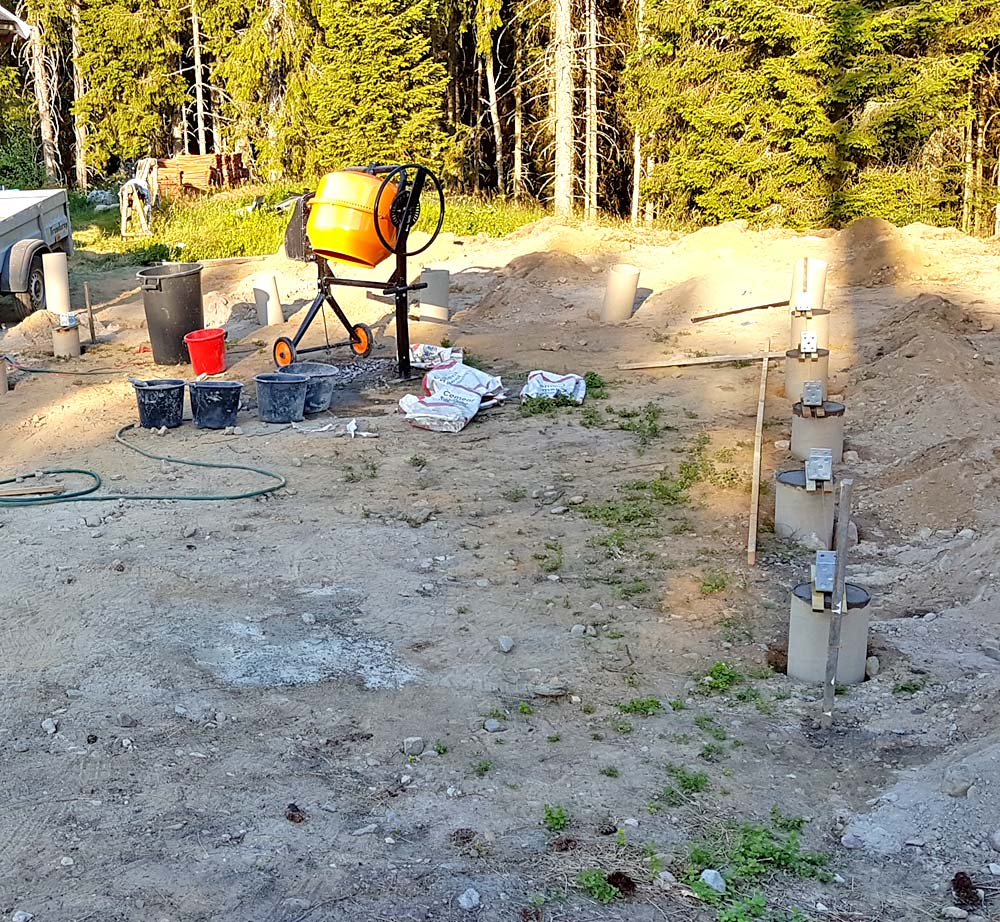
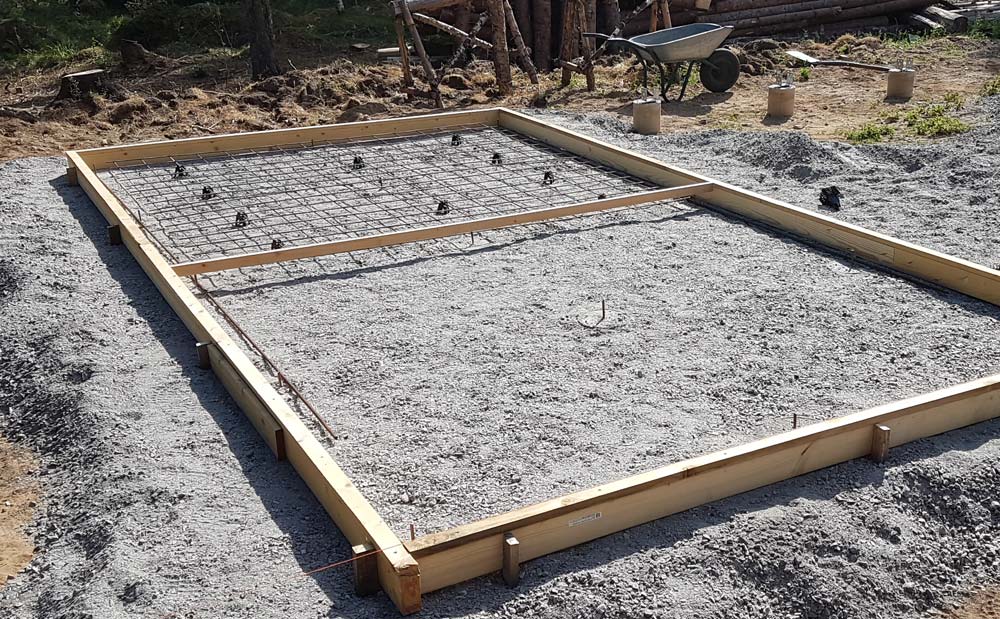
Next I compacted the ground, and made a form for the 110 mm thick concrete slab. I cast it in two sessions, each being a full day event. At the bottom I placed a 6 mm rebar grid for concrete tension support. This was the driest summer in a generation, so I had to ration all water to save enough to complete the slab, driving to a nearby lake to take baths.
After a week of watering and waiting, it was time to lay down some sill protection paper, and screw the impregnated sills to the slab. Next I raised the 90 x 120 mm posts in the corners of the workshop.
I erected the rest of the garage frame. It stands on 90 x 120 mm (4" x 5") posts, screwed to the concrete post brackets. Ceiling joists and rafters are 45 x 170 mm (2" x 7"). Roof angle is 15 degrees. 45 x 95 mm (2" x 4") horizontal beams are screwed to the posts.
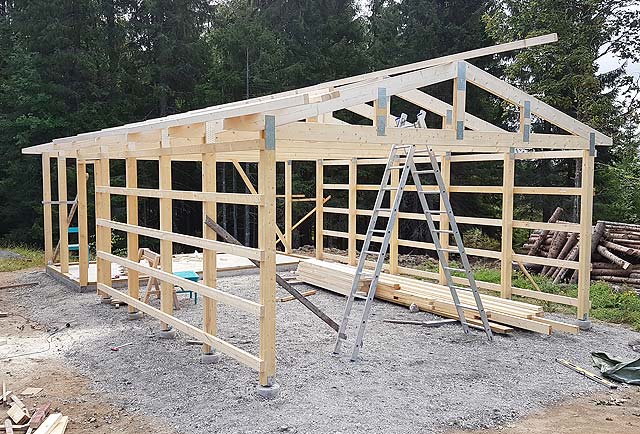
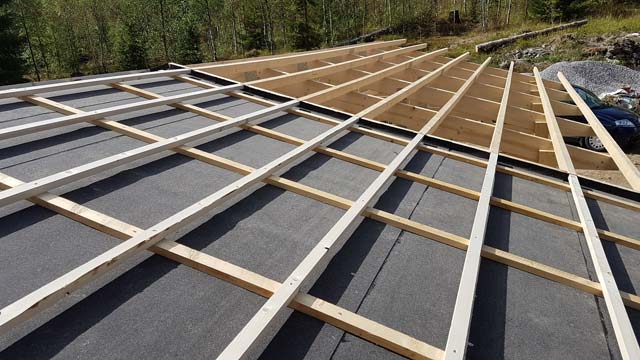
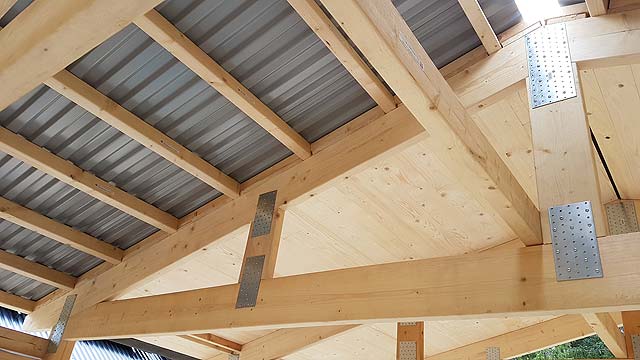
To make the workshop roof, I screwed tongue-groove boards to the rafters, covered it with tar paper, and then mounted a grid of battens that aligned with the 45 x 70 mm (2" x 3") purlins that covered the rest of the roof.
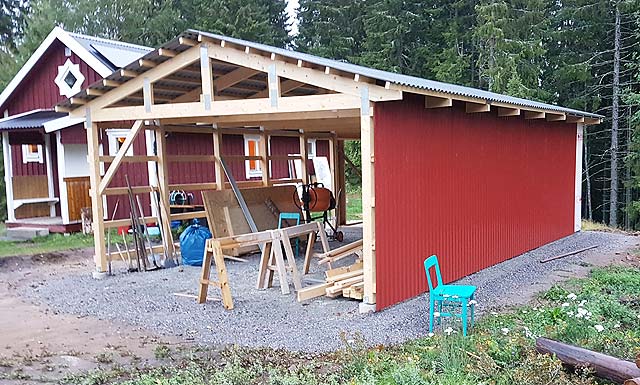
Next I mounted corrugated sheet metal on the roof and back wall. Black for the roof, and red for the wall. Finally my gear was protected from the elements!
Detail of the ceiling, where you can see the truss, the purlins, the tongue-groove boards and the corrugated roof.
I erected the workshop wall frame from 45 x 95 mm (2" x 4") studs, and screwed 10 mm OSB board to it, and then stapled a weather membrane to the entire outside.
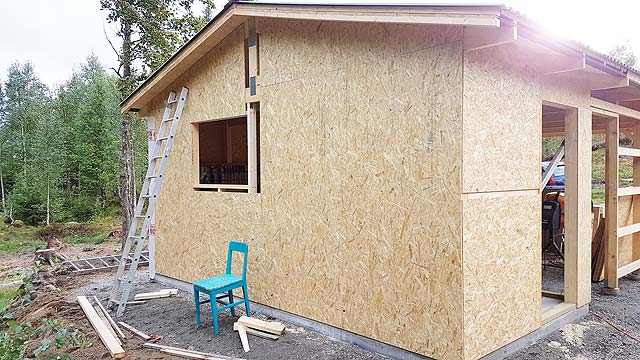
Then followed lots of sheet metal work. The interior walls were filled with mineral wool, and then covered with more OSB board to make it smooth. After mounting a door and a window, the workshop was done.
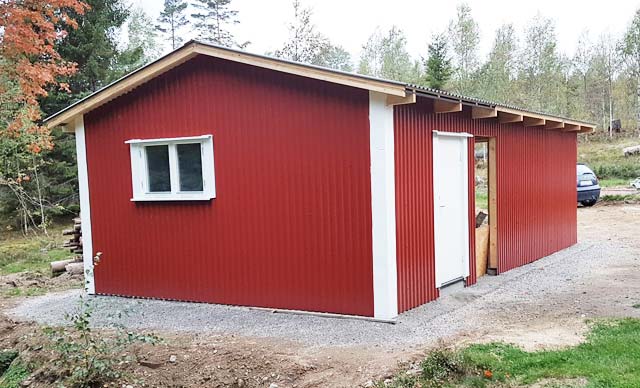
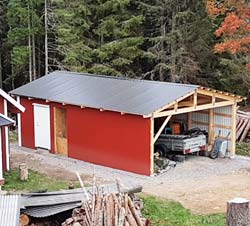
The garage is now 90% done. Needs gables, gutters, two garage doors and electric installations.
The well
After suffering the low capacity of my small well for a few years, the tipping point came this summer when it ran completely dry for one month. It was time to dig a new one.
I got busy with my spade, hoe and digging bar, and dug a large and deep hole next to the garage. It would be handy if I could find water this close to my home. When I reached 2 m, the ground got damp and finally some water started to drip in the hole. I was excited for a few minutes and then hit bedrock. Bummer.
After some research I found out that a well next to a bog is actually a great idea, because the bog is a natural water reserve and acts like a filter against impurities. So I started digging near my old well, but closer to the vast bog that borders this area.
The top soil was black and full of preserved bog material. After 30 cm it turned to really tightly packed gravel, which was a real challenge to dig trough. At 1.2 m, water started to drip in. I continued digging to 2.8 m. It got very muddy, but it was a nice relief to be down the cool hole in the hot summer days.
However, the big problem was the lining of the hole. Normally concrete rings are used, but this area was not accessible to heavy machines. I decided to use a polypropylene plastic road pipe, 1 m in diameter and 3 m long. I rigged up a mounting support of wood near the hole, then carefully moved the pipe there.
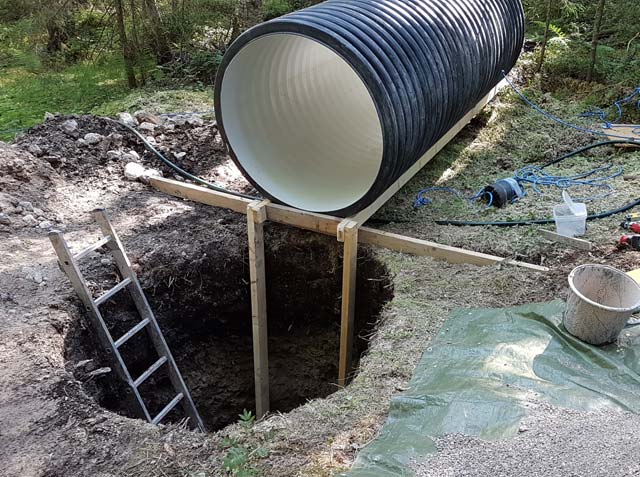
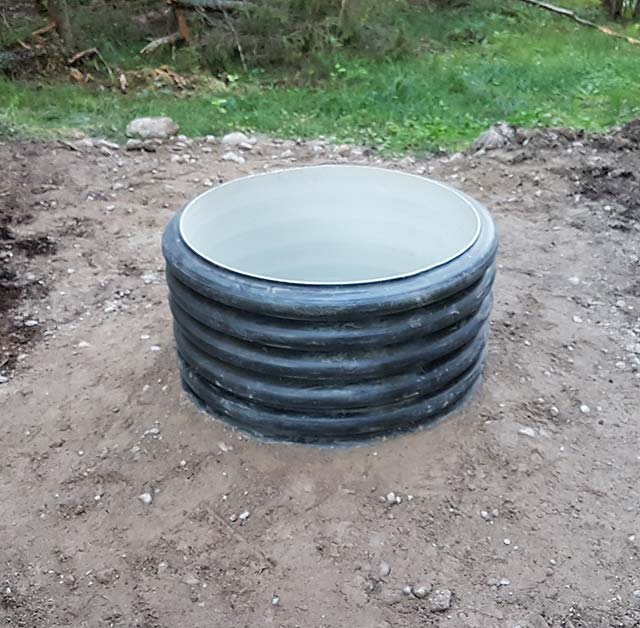
I filled the bottom with coarse sand, 30 cm thick. With the help of a winch, I slowly lowered the 150 kg pipe into the hole and luckily it fit perfectly, with the top 0.5 m above ground. I filled the void on the outside, first with coarse sand up to 1 m from ground level, then with the dug up gravel to create somewhat of a barrier against surface water.
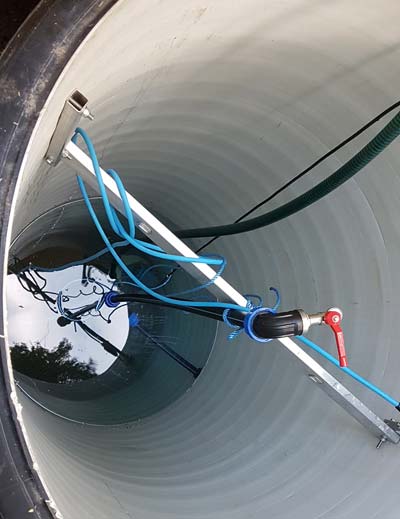 1.2 m below ground level, I drilled a hole in the side, and mounted a tight seal for a 32 mm PEM fresh water pipe. The pipe got connected to a deep well pump at the bottom, which was suspended by a rope from an aluminium bar mounted at the top of the well.
The water is crystal clear, and tastes very good. However it has the low pH of 5.9, so it will corrode some metal pipes. I will only be using plastic pipes and stainless steel pipes, so this won't be a problem.
There are several ways to treat the water to raise the pH level. But I will just accept it as is for now, since it doesn't affect health.
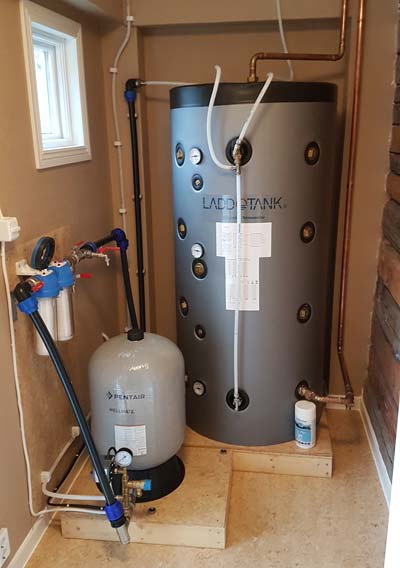
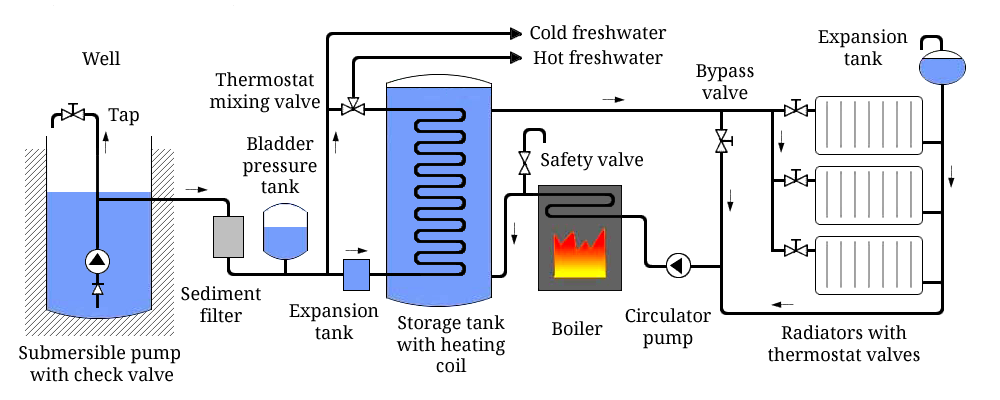
The fresh water pipe leads up into the house vestibule, where it passes through two sediment filters, and then into a bladder tank with a pressure switch that turns the well pump on and off.
From the tank are two 15 mm PEX pipes, one for cold and one for hot water. The hot one passes through a loop in the house heating tank (the large one seen to the right). They both lead into the house to provide fresh water to the kitchen and bathroom.
The heating system

A lot of copper pipe got installed this summer, in preparation to use the second hand Wamsler boiler I bought earlier. I used 28 mm pipes in the main loop between the boiler and heating tank, 22 mm pipes for the radiator stems, and 15 mm prisol pipe from the stems to the radiators.
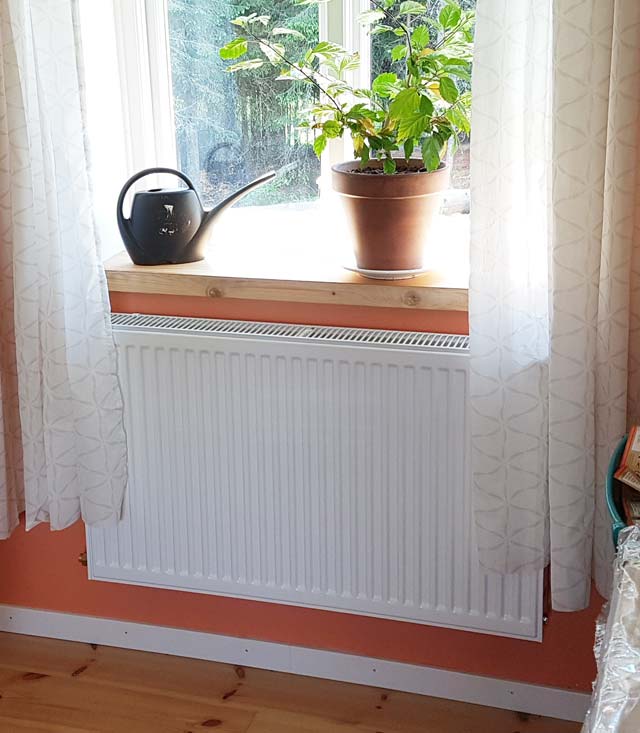
I mounted one 1000 W radiator in the bedroom, one 1000 W radiator in the living room/kitchen, and one 400 W radiator in the bathroom. All with thermostat valves.
This will be a simplified two pipe system, with one circulation pump only, and a by-pass valve (seen to the left). No layered tank or special heat loading circuit. Everything is complete except the last stretch of pipe to the boiler.
I heated the fittings with a blow torch and used a silver/tin solder to join them.
I haven't decided yet if I will cold proof the system with propylene glycol, which can be expensive, or if I will drain the system every time I prepare to close down for the winter.
Schematic of the heating and fresh water system.
The bathroom
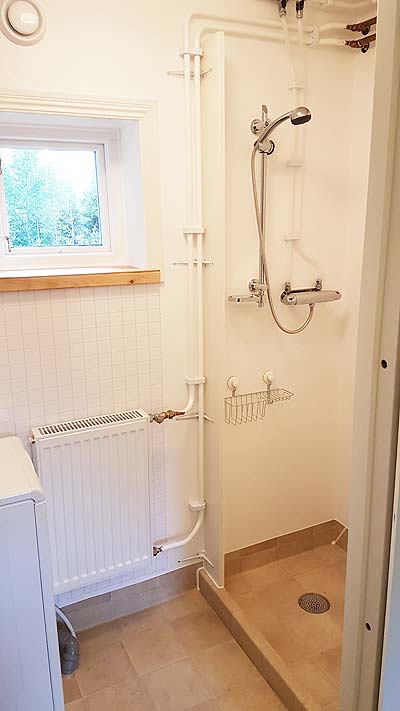
It felt too uncomfortable taking showers in the cabinet I bought earlier, so I threw it out of the bathroom and built a proper shower area instead.
First I had to seal the walls with several coats of special water proof paint, and then mount some vertical strips of wood to help the shower curtain close off the area.
I also mounted a threshold to keep the water from flowing into the room.
All corners and cracks were sealed with caulk.
The radiator mentioned earlier got mounted on the wall.
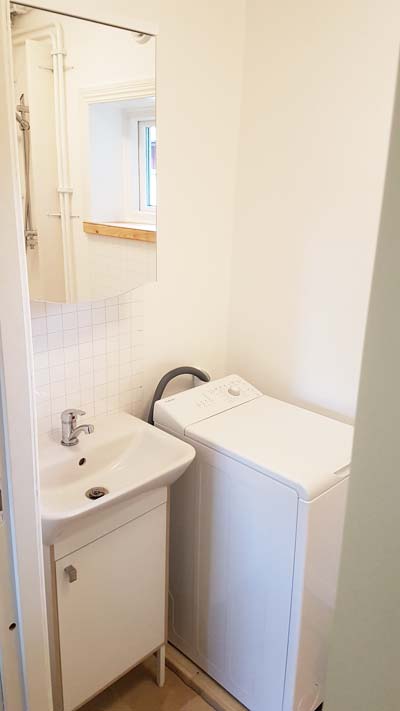 Then for the left side of the bathroom, I mounted a mirror cabinet and a small sink. I built a sturdy platform and installed my washing machine.
The bathroom suddenly looked very welcoming instead of being a constant eye sore.
It is indeed a tiny bathroom, but it has everything I need to be comfortable.
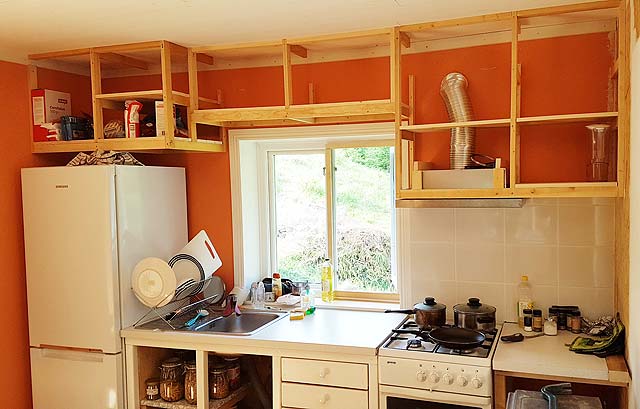
The kitchen
I built the frames and bottoms for the kitchen cabinets and installed the stove fan. Next step is to mount the doors. I also mounted ceramic wall tiles, and extended the counter top to the right side of the stove.
The shed
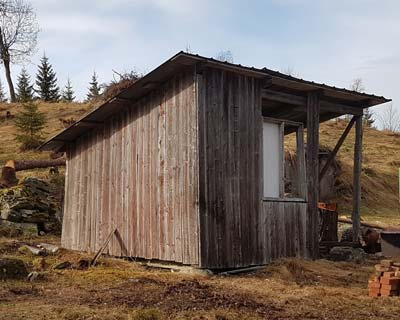
This old shed was my good companion for the first two years. It was my outhouse, and also stored lots of building equipment.
Finally I got it demolished and burned down. It was too old and rotten to be saved.
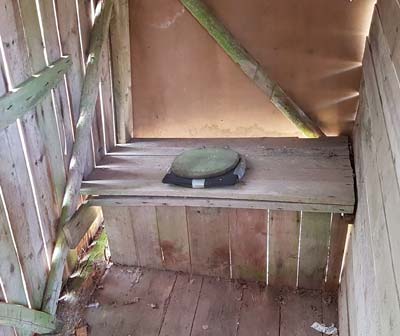 Looking at this outhouse seat is a good reminder of what life used to be like in the old times.
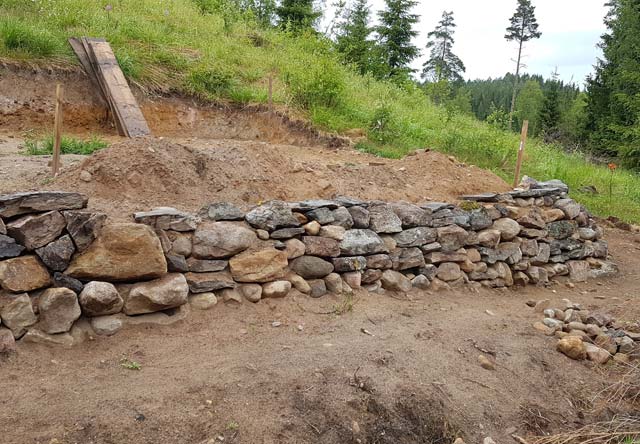
The stone wall
I leveled the ground near my hill in preparation for a green house, and had to build a retaining wall. I decided to make it a very simple pile of rocks, leaning into the wall. Might not look very pleasing in the long run, but it will at least keep the dirt from sliding down.
The fruits of nature
To take a break from building, I went picking lingon berries and mushrooms.


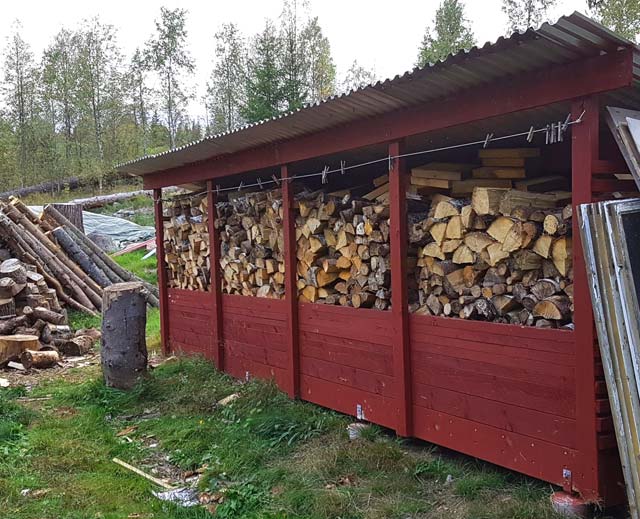
The firewood
More than 20 trees got cut down to prepare the area near the garage. I had plenty of firewood to chop, and quickly managed to fill my storage shed.