
Finishing the bedroom
 The floors of my cottage feel cold and are generally in bad shape. So I decided to replace them, and started with the bedroom first.
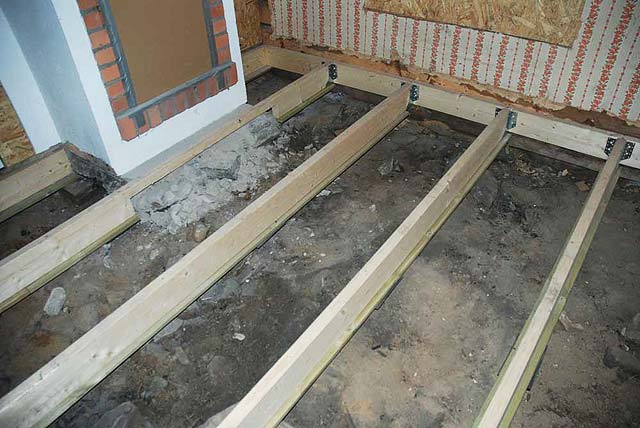
When I removed the floor boards I saw some rotten parts, and was glad that I decided to have it all replaced.
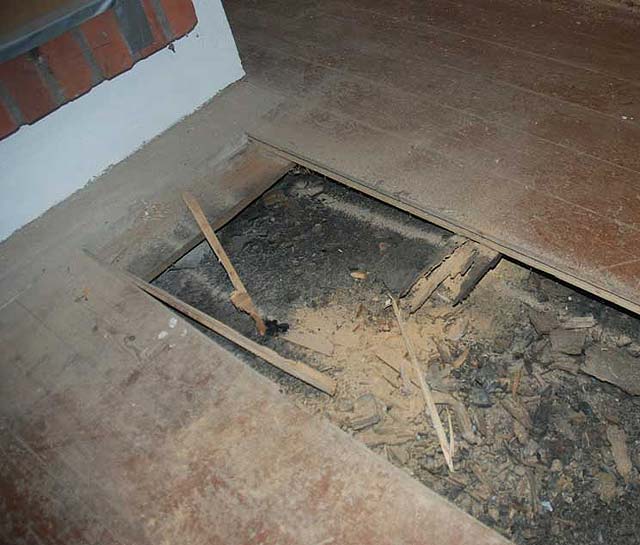
Beneath the floor boards waited loads of charcoal that they used as insulation between the floor beams. I choked and suffered while digging it out.
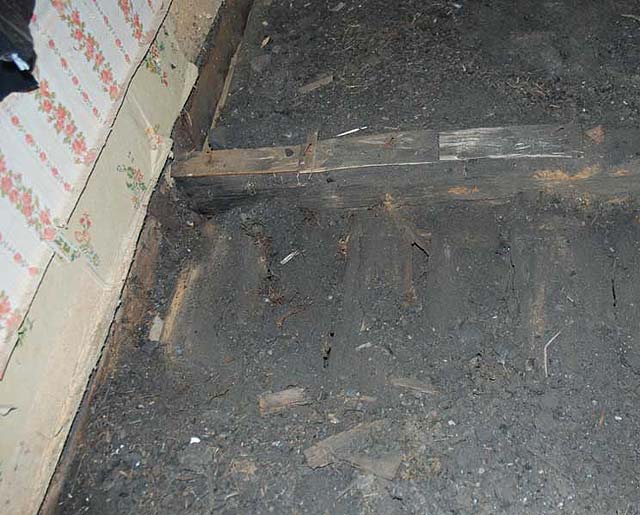
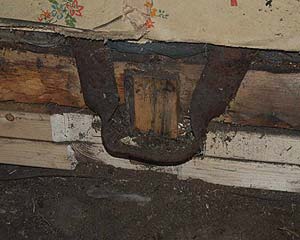 This 100 year old floor was built just like a modern floor, although with outdated materials; parallel joists to support the load, mounted 80 cm apart, and secured to the sills with joist hangers (see picture to the right). A sub-floor of thin planks were nailed to the joists, to support the charcoal insulation poured in between the joists. Then the floor boards nailed straight to the joists, to cover it all up.
I mounted a frame of beams to the old sills, and then 145x45 mm (6x2") joists (reglar) with joist hangers (balkskor), 60 cm apart, which is standard here in Sweden. Duckboard (trall) is screwed to the underside of each joist, to support the sub-floor boards.
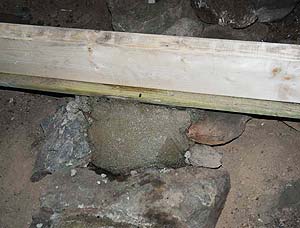 My plan was to dig down concrete footings to support the joists, but the space below the floor did not allow it.
Instead, I nailed sill felt (syllpapp) to the underside of the joists at the support points, then placed rocks around, and poured in concrete to build a 100x300 mm footing. Each joist got two support points, 135 cm apart, which should be enough to support normal loads.
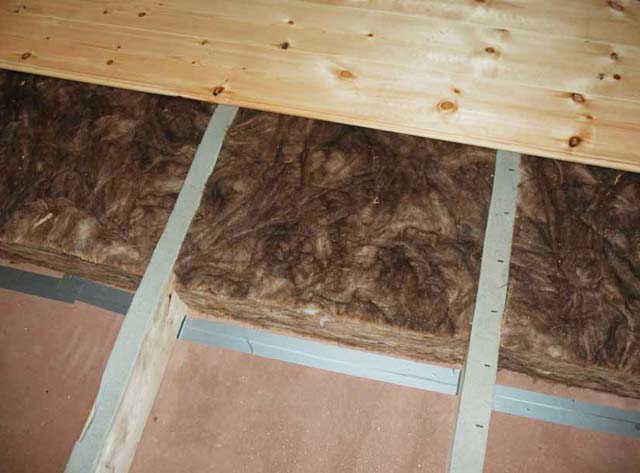
Putting in the sub-floor was a simple matter of dropping in ready-made boards (trossbottenskivor) between the joists (in red color below). Then a layer of 145 mm mineral wool insulation, and 27 mm thick spruce floor boards.
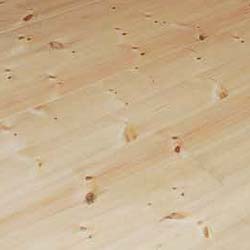
After about a week of work, the bedroom floor was complete. Instead of putting on a layer of lacquer as is commonly done, I instead coated it with a type of hard wax, which is supposedly easier to maintain over the years.
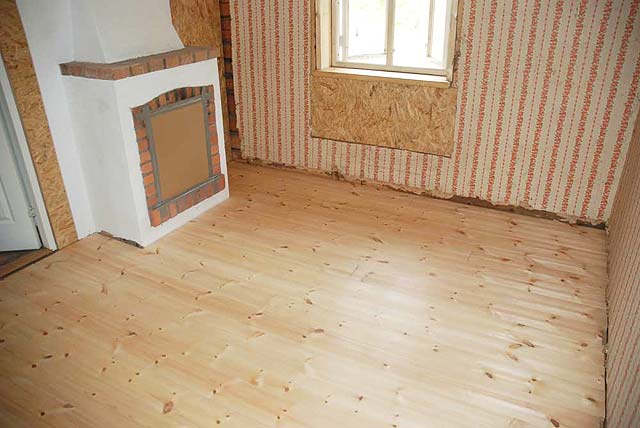
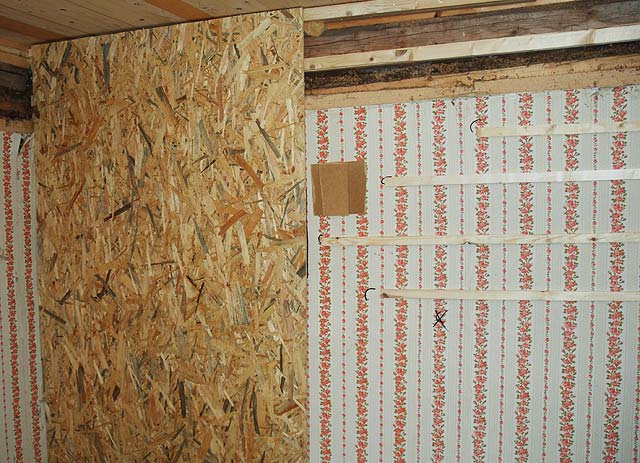
Next I put up the OSB wall boards. It was a bit tricky because the walls are far from straight in an old log house. So a lot of small wood and hardboard pieces were nailed before the boards could be mounted.
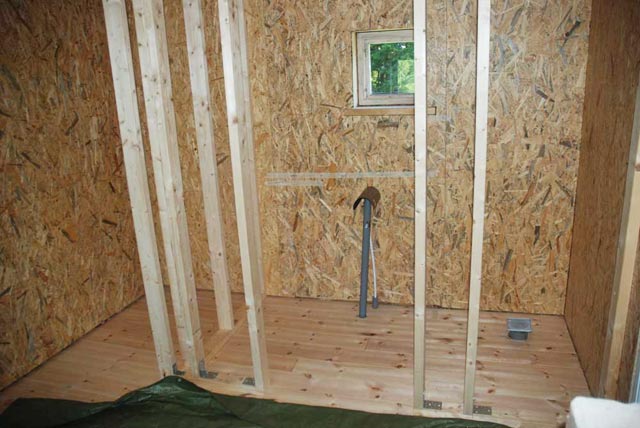
After the wall boards were done, I divided up the room into a bedroom, bathroom and closet by mounting some 95x45 mm posts with metal brackets.
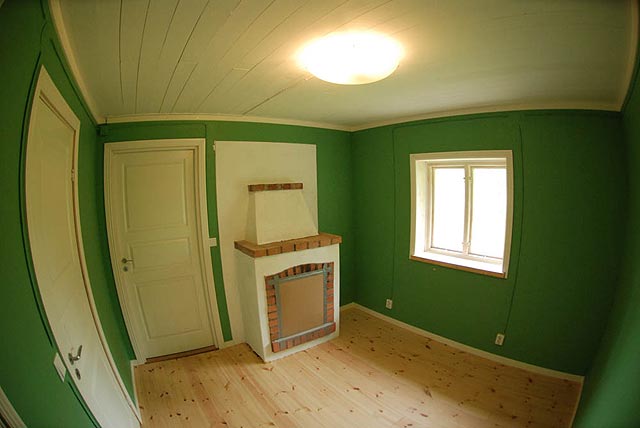
Then I covered all board joints with fiberglass tape, and spread out putty on the walls to make them really smooth. I had hoped that the putty would hide the OSB fiber texture, but after painting the walls, it was still visible. To keep things simple I installed electrical cords on the walls, instead of using conduit inside the walls, as is normally done. I picked a bold green color for the walls, because I felt bored with all the bright shades that I've used in the past. This made a more retro feel. Finally, I mounted the decorative white strips. Next step is to repeat all this for the kitchen/living room.
The below drawing shows the design of the walls. The front boards follow the "one under/one over" design that is very common in Sweden. This makes them look nice, and also allows water on the inside to drain out well. The lath strips separates the front boards from the paperboard. The paperboard prevents winds to disturb the mineral wool insulation, making it more effective. The studs keep the insulation in place, and are mounted at a standard 600 mm apart. The logs and fiber board are original materials from a long time ago, and the OSB gives the interior walls a nice smooth surface.
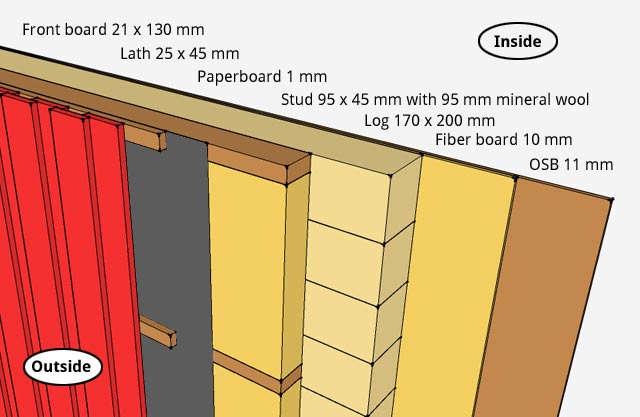
The advantage of putting the mineral wool on the outside instead of on the inside, is that the thermal mass of the timber frame keeps the indoor temperature more even.
Some people prefer the look of exposed timber logs, and don't put any boards to cover them up. But to me it looks better with a nice smooth wall surface.
In Sweden it is very common to put a vapor barrier in the wall, to prevent condensation problems. This is when hot humid air on the inside passes through the wall and hit cooler layers near the outside where it condensates to form droplets that rot the wall. The worst case scenario is very hot humid air from cooking or showering, stuck inside a poorly ventilated house, on a cold and dry winter day.
The solution is to mount a thin sheet of plastic on the inside, as close as possible to the inner surface, but not so close that it gets penetrated by wall mounting screws. This seals off all walls from the humid air, which can now only leave through the ventilation ducts. This vapor barrier only works if the inside of the house is always hotter than the outside, which is not always the case with vacation homes that are left unheated for long periods of time. Then the vapor barrier could instead make the walls rot faster than normal, when hot humid air on the outside penetrates the walls and get stuck near the cooler vapor barrier. In my case I didn't install any barrier.